Showing posts with label Pinned it and Did it. Show all posts

Saturday, June 30, 2012

PINNED IT AND DID IT: Fun activities to keep your kids occupied when it's TOO HOT OUTSIDE

I love Summer! But sometimes there's just a little too much unstructured and unplanned time. When the kids have been going nuts, I've turned to our good friend Pinterest (and some of my favorite blogs) to find us something fun and easy to do. I LOVE activities that take little or no planning, and use things that we already have on hand. If you're looking for some, here are a few that worked GREAT.

Our first boredome buster was Dino Fossils from Little Bit Funky (who is doing a "40 Ideas: Activities to do with kids" this summer, she has some really good ideas already posted. Our next one from her is going to be the water balloon pinata - THAT is going to be a hit!):

We happened to have a bunch of crayola air drying clay left over from gifts Luke received long ago (if we did it again, we'd use another brand, Crayola is too squishy). And of course we're certainly not short on dinosaurs or tiny animals to make the fossils from. The boys loved this, and wanted to keep the fossils with the animals to use as a matching game. I was planning on having them just do a few fossils each (maybe 6?) But they loved it, so we made one for every animal we had, and used up our store of clay.


Secondly (and an even BIGGER hit): Straw Rockets. 

I have had this pinned for a while, I pinned it myself from Ucreate, and then one of my favorite craft bloggers (I Am Momma Hear Me Roar) made them with her kids too.So a few afternoons ago, when the kids were driving each other crazy, and it was WAY too hot to play outside, we got out our paper and crayons and went to town.

This takes no time at all, involves things you're likely to have on hand, and the kids can entertain themselves for hours blowing them off straws once you're done.

 Win-win.

Wednesday, May 16, 2012

PINNED IT AND DID IT: ICE BLOCKS

As part of my "stop the TV madness and do something" plan with the boys, I went digging down to the bottom of my "Crafts to do with the kids" board for something I pinned when I first joined Pinterest (but had never gotten around to doing.)
This is called "Frozen Fun" and boy was it!! It takes some planning ahead - but the boys enjoyed the set up as much as the end activity. And it was basically free, since it uses water and found items! The original activity froze things in plastic bins - but I don't have any of those that aren't full of something I didn't want to dump out. So we used gallon size zip locks, and that worked out great.

So...when I was at the very beginning of my "Nope. No BEE-BEE shows. Play and have fun, boys" initiative, there was a lot of complaining, whining, asking repeatedly for "Gabba Gabba Gabba".

I quickly realized that I needed to do something with the boys, and plan things to keep them occupied (I did actually know how to do this at one point. It's like all the change sucked the problem solver out of me!) So after refreshing myself on what "Frozen Fun" required, I gave both boys a gallon zip. We went through the bins and baskets of toys in our living room and looked for small items. I gave them each a 1/4c measure and told them to find things that fit inside that. I still had to fish out some GIANT things, but it mostly worked. We had a LOT MORE little things laying around than I realized.


After they had enough in their bags, I filled them with water, put them on my large rimmed cookie sheet, and stuck them in our deep freezer. That thing is crazy cold (we have to microwave ice cream before we can scoop it), but it still took a while to freeze all that water. We tried taking them out after a couple of hours (maybe 4?), but they were still liquid in the middle (duh.) So wait several days...

Then, on an afternoon when you're kids are antsy and needing entertainment... Get them out, tear or cut off the bag, place it in a bowl or bin (we didn't want to lose the little toys to our deck), and let your kids go to town.


 They were pretty excited to dig things out using kitchen knives (butter knives, not sharp ones. And they got bent, so if you're attached to your silver....)
 But water and salt worked better.
 People. I'm not kidding, this was awesome. 1 hour later, and they were all three happily working together (even though I'd only made a bag for the 2 littles.) Luke got bored after an hour, but Tobin and Micah were engaged for another hour or so.
 When it was dinner time, Tobin agreed to come inside without getting his last few holdouts. But he did check them throughout the evening, and was overjoyed when the last thing came unfrozen.
This is a great pre-school activity - but I think it would work with young toddlers as well, you'd just need to help (or enlist an older sibling, like I did.) Micah LOVED pouring water over the ice, and also enjoyed chipping away at the "COOOOOOOLD!"

We'll be doing this again. I wonder about coloring the water, so they can't see the toys they're digging out as well - it would be like a treasure hunt!

Sunday, April 8, 2012

Peep S'Mores

The Marshmallow Peeps are likely to be on sale tomorrow. Want to do something fun?

This might be the first thing I ever pinned & did from Pinterest - and we LOVED it last year, so we did it again this year. The original pin was from here (and her pictures are much better than mine!)

Get some chocolate bars (I use dark chocolate because it's yummy), graham crackers, and peeps of your choice. Put half a graham cracker on a plate (I make 4 at once), top it with a square of chocolate, and a peep.

Stick them in the microwave for 15-30 seconds. Your kids may want to watch...the peeps blow up really big (don't over cook, the graham crackers will scorch.)

Then you just plop the other half of the graham cracker on there, and enjoy.

You should do this, it's a fun Spring/Easter treat.

And if you do, then your kids too can get this messy: 


Unless of course, they're OCD like our youngest. In which case, they'll get marshmallow on their hands, freak out, and be so obsessed with getting it off they won't eat a bite.

Friday, April 6, 2012

PINNED IT AND DID IT: Pinterest Recipe Round Up

Not to many kids' crafts going on around here right now, with traveling and birthdays. But I'm definitely not neglecting Pinterest. Thought I'd share a few of the many Pinterest-inspired things I've done over the past few weeks... basically a listing of really awesome recipes. We've had some great luck, these are some of the best recipes I've ever tried. But it's not all recipes...

For starters, much of Tobin's Knights and Dragons birthday party was ideas I found or got instructions for through Pinterest.

And there's always this idea, which I can't even find the pin for anymore - but you should TOTALLY pin it, or at least remember it next time you're boiling:


Did you know that when you are boiling something - pasta, potatoes, etc. - if you put a wooden spoon over the pot, it won't boil over? I've been doing this for months, and I've only had a boil-over one time. In that case, I already knew I had way too much water in the pan (I was making noodles), and was in the process of grabbing a hot pad to pour some of the water out. So if you don't overfill your pot, it works like a charm. Amazing.

If you are facebook friends with me, you know I've been looking for kid-friendly fish recipes. I've been reading at Raising Healthy Eaters that most kids don't get nearly enough DHA, so I'd love to serve more fish. I pinned this recipe from one of my favorite blogs, The Frugal Girl, and it was the first fish recipe I introduced to the family.


This was a HIT. You should totally make this. It's actually a LOT like our favorite Asian dish, Taiwanese 3 Cup Chicken, so I think my boys were preloaded to like it. Tobin is not picky at all (he'll try anything) but hasn't ever liked fish. But he asked for seconds of this, and said, "I LOVE THIS MEAT!" I served it with brown rice, and doubled the sauce because I could tell from the recipe that the boys would love it.

Speaking of hits...


This little baby went viral on Pinterest a few months ago. I've made a few chicken enchilada recipes, and we haven't really loved any of them. But this:


...was INCREDIBLE. So very yummy. Matt ate the leftovers the next day and texted me: "Leftover chicken enchiladas tasted SO GOOD. Make a double batch next time please." I highly recommend this recipe!

I was a little sad I didn't try it earlier... Primarily because I've been limiting Micah's dairy intake. I'm not going totally dairy free, I just think it's hard on his system, so we're using alternative milk, yogurt, and cheese, and have cut out sour cream (wish I could find some non-dairy yogurt that wasn't fruit flavored, because I'm sure I could substitute that for sour cream. But so far, no luck.)

BUT...I was able to make this for Micah, and he liked it. I put 2 of the enchiladas in a smaller container, and instead of mixing grated cheese into the chicken as the recipe calls for, I used goat cheese.

The sauce started with a white sauce/roux, then you add in chicken broth, green chilis, and sour cream. After adding the broth, I separated out a fourth cup, added some green chilis, then melted another medallion of goat cheese in there. His sauce was a little thicker than ours, but he still gobbled his enchiladas up, both for dinner and then leftover for lunch the next day. WIN.

I did the same thing with another viral-on-Pinterest recipe, Baked Chicken Parmesan.

I'm not really a fan of Chicken Parmesan - I don't like how the breading on the chicken gets all soggy in the sauce. But I liked this. I didn't love it (not like the enchiladas, at least), but the rest of the family did (which is what I expected.) And I'm likely to make this again, whereas I'm not ever going to go to all the work of making Chicken Parmesan the normal way, because I don't care for it.

 I did the same thing for Micah with this one... I made a smaller portion with one chicken breast for him. I crumbled up the goat cheese instead of all the shredded cheese in the original recipe. I only used one medallion, but if I made it again, I would use two - I think it could use more cheese. This one wasn't quite as easy to adapt as the enchiladas, but yet again: Micah was perfectly happy.


 Next up... Cookie Dough Dip. We have a meeting of our college leaders every few months, and they've come to expect queso & chips and M&Ms. For our last meeting, we were in the mood for something different. So I made my friend Emily's AWESOME buffalo chicken dip (which has become MY buffalo chicken dip), and this yummy dip, which I'd noticed in my friend Sally's instagram feed.

 It was delish, although a little sweet for me. I think when I make it again (because I WILL make it again) I'll leave out the heath bits the recipe uses, I think I'd like a more pure cookie-dough flavor. But that didn't stop me from finishing off the leftovers the day after the meeting, so....

Lastly, two Pinterest standbys. I make these oven fries once a month, maybe?


But the broccoli? Every week...every time I buy broccoli, I make it this way. IT IS SO YUMMY. I wish I'd had some to make for dinner tonight.


Seriously. The best broccoli ever. Make it now.


Friday, February 24, 2012

PINNED IT & DID IT: Nutella Banana Bread


Don't get excited, it didn't come out that great (user error??)


I've had this pinned for a while, and I was super excited to try it because it involves nutella. I love nutella

(** Pinterest question: Has anyone tried to make the homemade nutella that was pinned by every person in the world 6 months ago? My SIL pinned it and tagged me. And then zillions of people repinned it without removing the tag, so I got zillions of notices. And then I learned how to turn off email notifications, because who has time for that?)

Anyhow... Here's mine:


It looks lovely, doesn't it? And it really is too bad the iPhone hasn't developed smello-vision technology, because it smelled WONDERFUL.  But... it wasn't that great.

Basically it's a standard banana bread recipe. You remove about a third of the batter and mix nutella into it. then you layer them in the pan and swirl. I don't know if I just didn't split the batter into thirds accurately, or if I didn't swirl it enough.

But the Nutella-less part was over cooked and super dry (the top got very brown, almost burned.) The part with Nutella was an ooey gooey mess. A delicious ooey gooey mess, but it was liquid. Luke refused to eat it (he thinks undercooked banana bread has the consistency of bananas. And he thinks the consistency of bananas is disgusting.)


Next week I'm going to try again (assuming we have some soft bananas around to use - I used the last ones from the freezer in this, and our family EATS BANANAS now. By the bushel it seems. Blame it on Africa.) I'm pretty picky about banana bread recipes, and have a favorite (I think a lot of recipes come out too dry.) I'm going to use my standard recipe, and try to swirl the Nutella part in more thoroughly. I'll probably also separate out more of the batter so the Nutella part isn't quite as nutella-full.

Next on my pinterest to-do list is this:


I picked out a couple of desserts in a jar as options for Luke's family birthday party on Sunday, kind of hoping that he'd pick the molten lava cake option. But you can't compete with peanut butter & chocolate in this family. This was the winner hands down.

Wednesday, February 22, 2012

PINNED IT & DID IT: Blow art monsters

We've done a couple of pins over the past few weeks, and I'm excited to share this one (the other one wasn't so much of a success. And it involved Nutella, who could have seen that coming?)

But for now, I'll show you this fun kids' craft from raisingsparks.com.


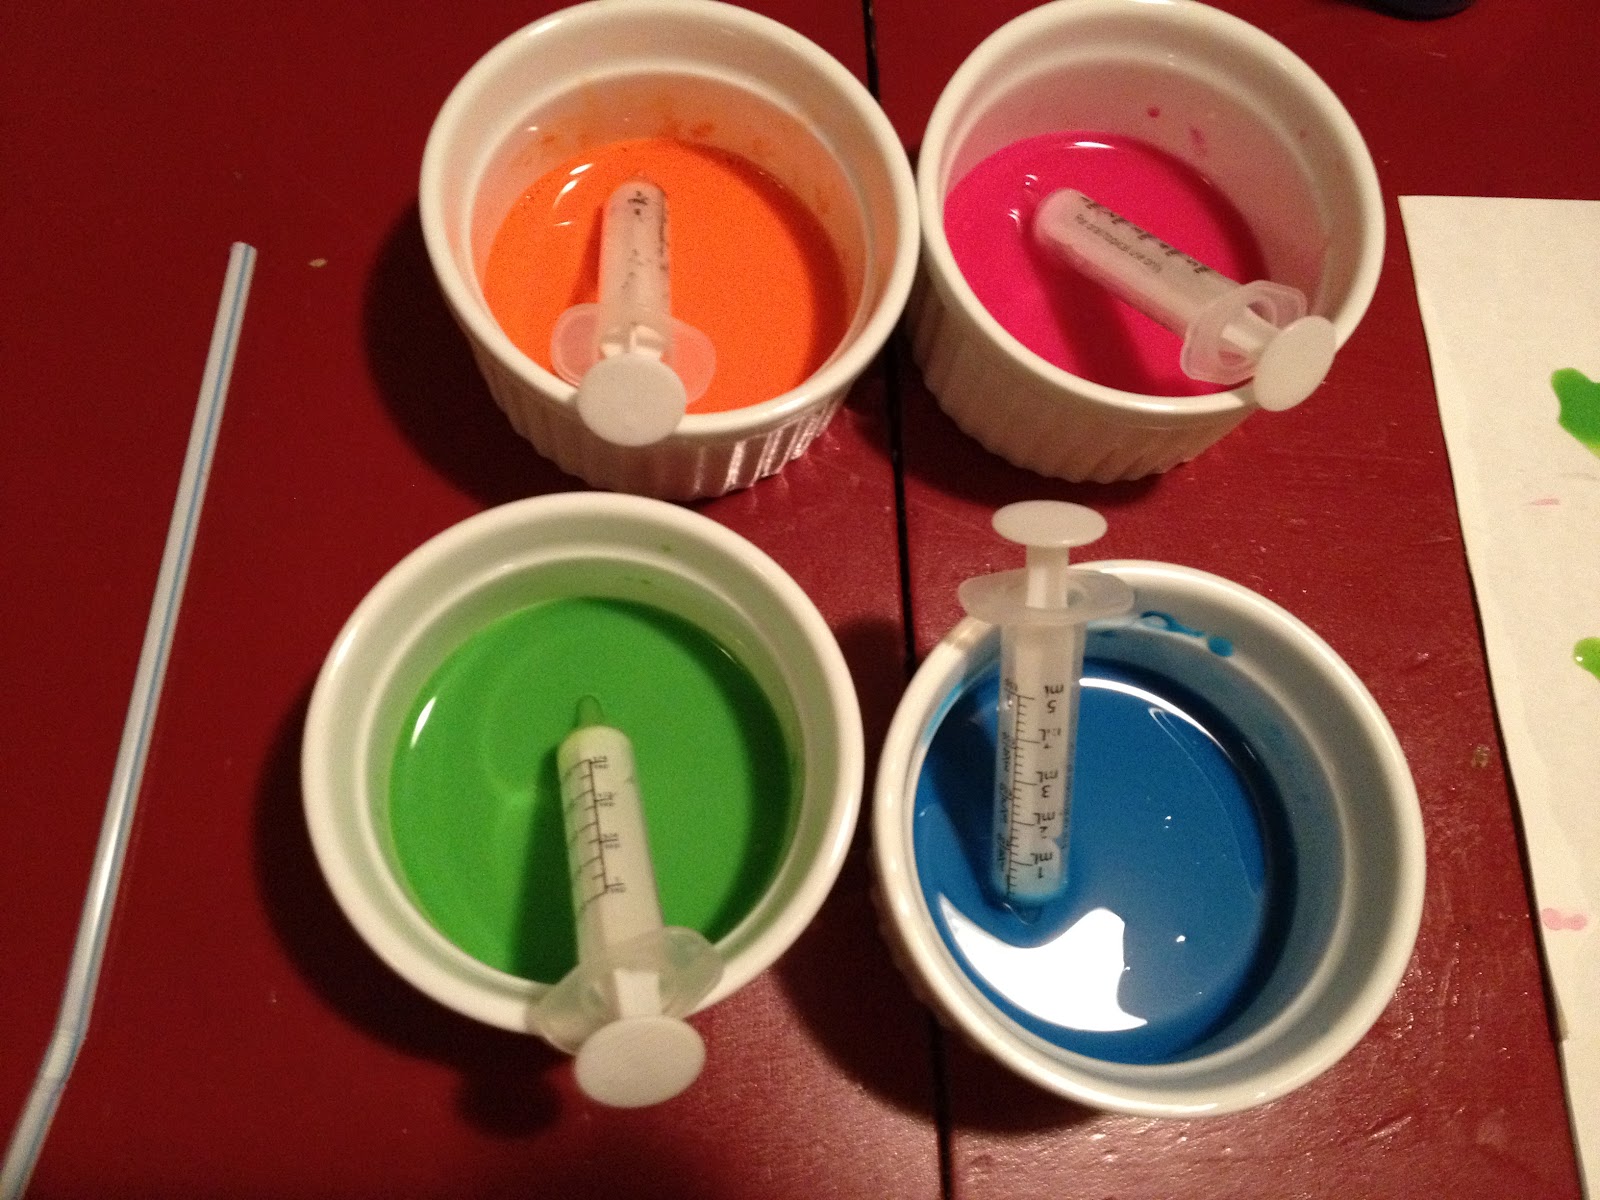
Super easy: All you need is paper, tempera paint, water, straws, glue and googly eyes. And some means of getting the paint onto the paper. Lucky for me we have a surplus of medicine squirters, after strepathon 2012.

We used stuff we had on hand, so it was free (well. It didn't require a trip to the store or extra expense. But we did almost use up the tempera pain I bought several years ago.)


To start, you water down tempera paints. The original tutorial said to water it down considerably. I thought I'd watered the paint down too much because it was pretty runny and some of our monsters bled together.


But when I tried a mixture with less water, it really didn't blow much. And it made the paper more wrinkly.


The paper does get really wrinkly. I was disappointed in mine, but now that I'm looking at the picture I had pinned, I realize that her paper is wrinkled too. This would be eliminated by watercolor paper, which is thicker - but I wanted to be able to use things I have on hand.

I dropped paint on their papers and they blew away.

After the paint dried, we got out the googly eyes and Elmer's glue. I put dots of glue on Micah's paper and let him put the eyes on. For Tobin, I put glue on a paper plate and let him dip the backs of the eyes in the glue and then place them himself.

And then I drew on mouths with a sharpie.


The bottom line: The boys LOVED this craft, and both younger boys were able to do it (Luke probably would have enjoyed it too, but he was at basketball practice.)

My only issue was that they both wanted to suck the paint up into the medicine dropper and squirt it out themselves. And I wanted to be in control of the paint. Always a struggle to balance their need for independence and creativity and my need to not have to clean up a disaster area.

But Cute:


You should do this, it's simple, easy and really fun!

Friday, February 10, 2012

PINNED IT AND DID IT: Easiest Hairpins EVER (30 minute craft!)

First of all, thank so much for all of the encouragement about my funky mood yesterday. It's amazing how much just writing it out helps me, and it sure is nice to receive so many kind words. I'm still thinking about the whole concept of keeping it real, so I may have more to say about that at some point (mainly: Do we think keeping it real = complaining and happiness = fakerpants?)


But in the meantime, I have another PIN accomplished this week. YAY! My main goal behind this is to do crafts with my kids - and we did one tonight while Matt & Luke went to basketball practice. But it's still drying and we'll finish it tomorrow, so you'll have to wait on that. I'm sure you'll all be on the edge of your seats to find out what we did (it involved paint and straws and only a little bit of paint drinking.)


So what I'll share this week is from my "TO MAKE FOR ME" board: Easy Peasy Hairpins, from I Am Momma Hear Me Roar.

These are just as easy as promised... Definitely finished a bunch of them in one episode of Blue's Clues (thank you Netflix!)

All you need is strong glue or adhesive, bobby pins (I bought special ones with a place for a charm), and something cute to glue on. I planned on using buttons, but all of the buttons I liked had loops on the back and I wasn't sure I'd be able to snap them off. So I found other things I liked.
I couldn't find any of the glue she used in the tutorial, and I had some E-6000, which is amazing, so I used that. It worked great on the charms I picked up at Hobby Lobby. But I also tried some beads that I already had from another project...didn't work so well on those (too shiny, I think. If I try again, I'll see about sanding off the back of the beads. But I wasn't in the mood for that this time around.)

So now I have some cutie red roses...

 Aqua!!
 And some bling.

 This would be a fun craft to do with a friend or a group - especially since the bobby pins and baubles come in packs of at least 2. I only need/want one of each kind, so I'll be giving the rest away.

I wore the aqua one this week, and tried to get a picture to share... In this one I'm either thinking, "Hmmm. I don't think the camera is supposed to be in the picture." OR "Hmmm. I feel kind of like an idiot."


"Maybe it would be better if I smiled?"
 "We'll just go in for a close up."
Super cute (I think!) and super easy! Make some today!

Happy to move this one off of my "to make" list and onto my "MADE" list! Next week will be a kids' craft!